Categories and Folders

A particular goal will have a greater chance of success if it is broken down into simple, clearly-defined, steps.
We use Folders in Chaos Control to break down larger goals and to organize projects by category. It works similarly to folders in a file manager:
Let's say you want to create a website for your personal or business project. Usually, in such case, people either create a “Make my website” project, or they simply begin to write down tasks related to the website right on a simple to-do list. This approach usually does not lead to positive results.
Here's how to approach a goal like “Make a website” using categories and subcategories:
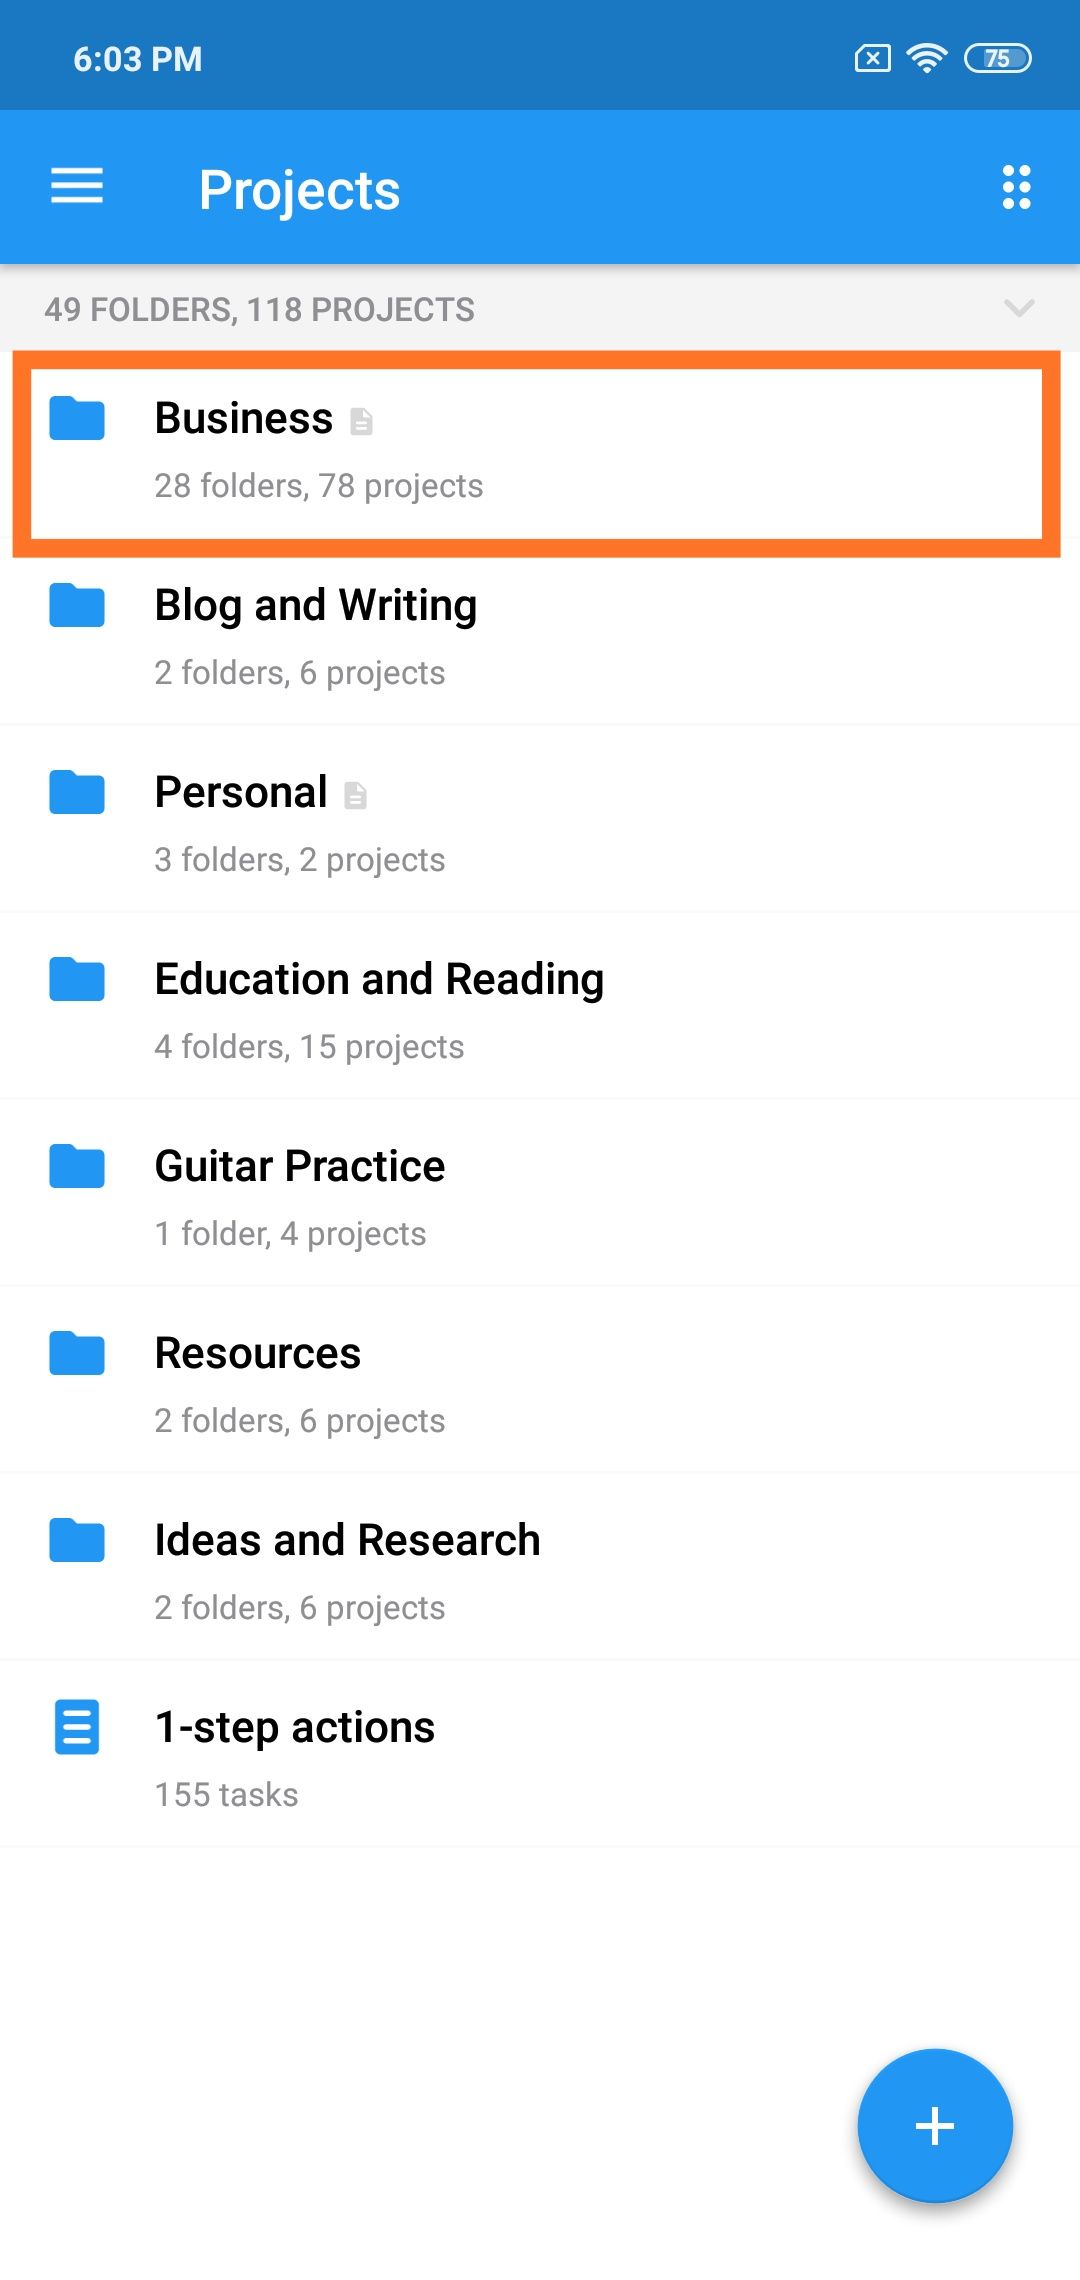
1. Since "Create a website for my project" is usually related to business or work, it is clearly worth placing it in the corresponding folder in the "Projects" section:
2. To make a website, usually you need to prepare its content, (texts and pictures), think over its structure, make a spec document for designers, review the intermediary results several times, test the website and finally, publish it. And this is only a start - your website still needs to be constantly maintained, updated and improved.
So we have already decided that the place for the tasks devoted to the website is in the Business folder. It’s logical to create a subfolder called "My website" under “Business” with subfolders like "Website launch" and "Further development."
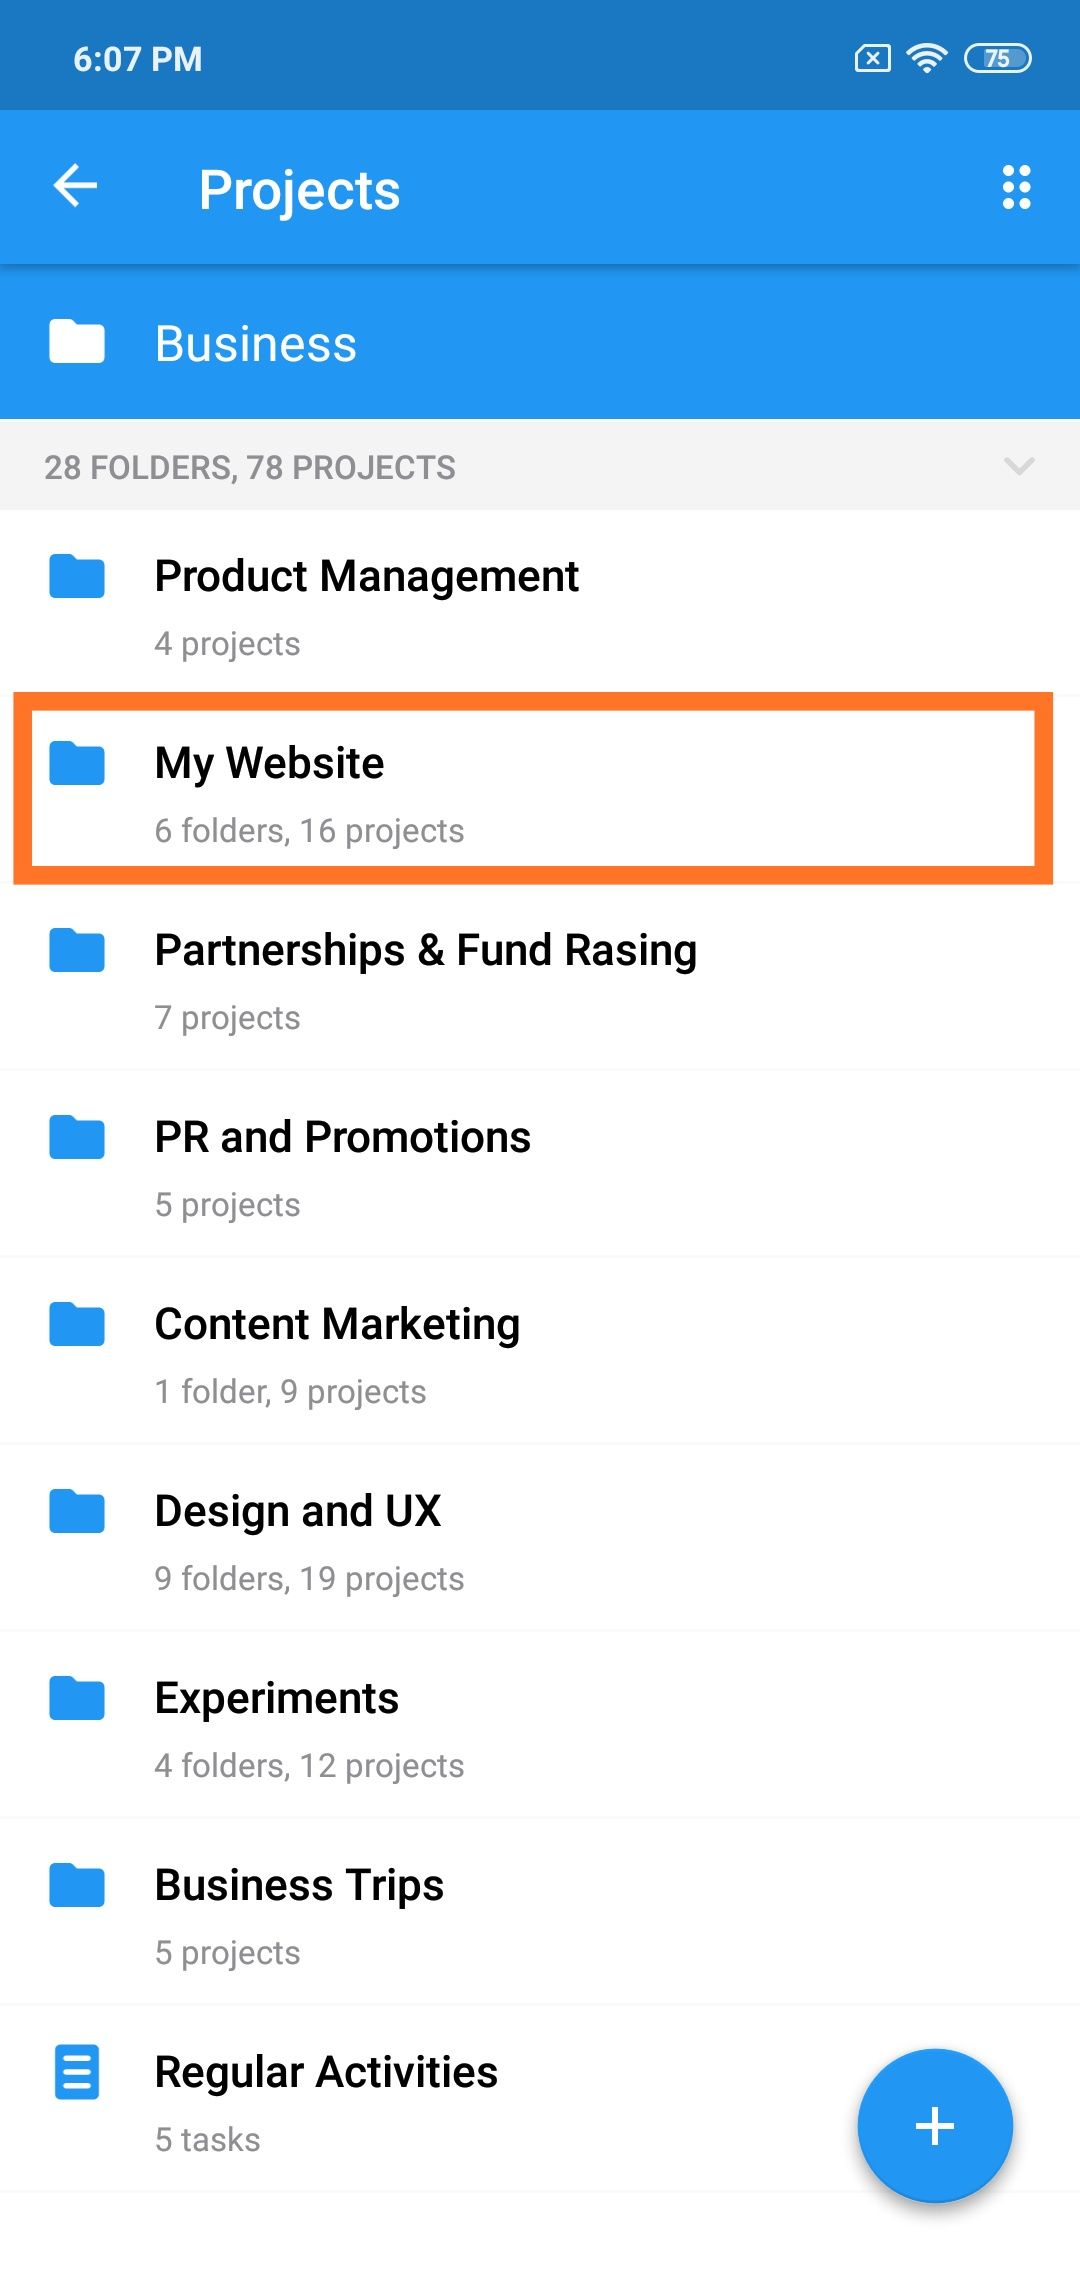
If the website launches successfully, then other subfolders like "SEO and Analytics," "Content," "Promotion" can be added:
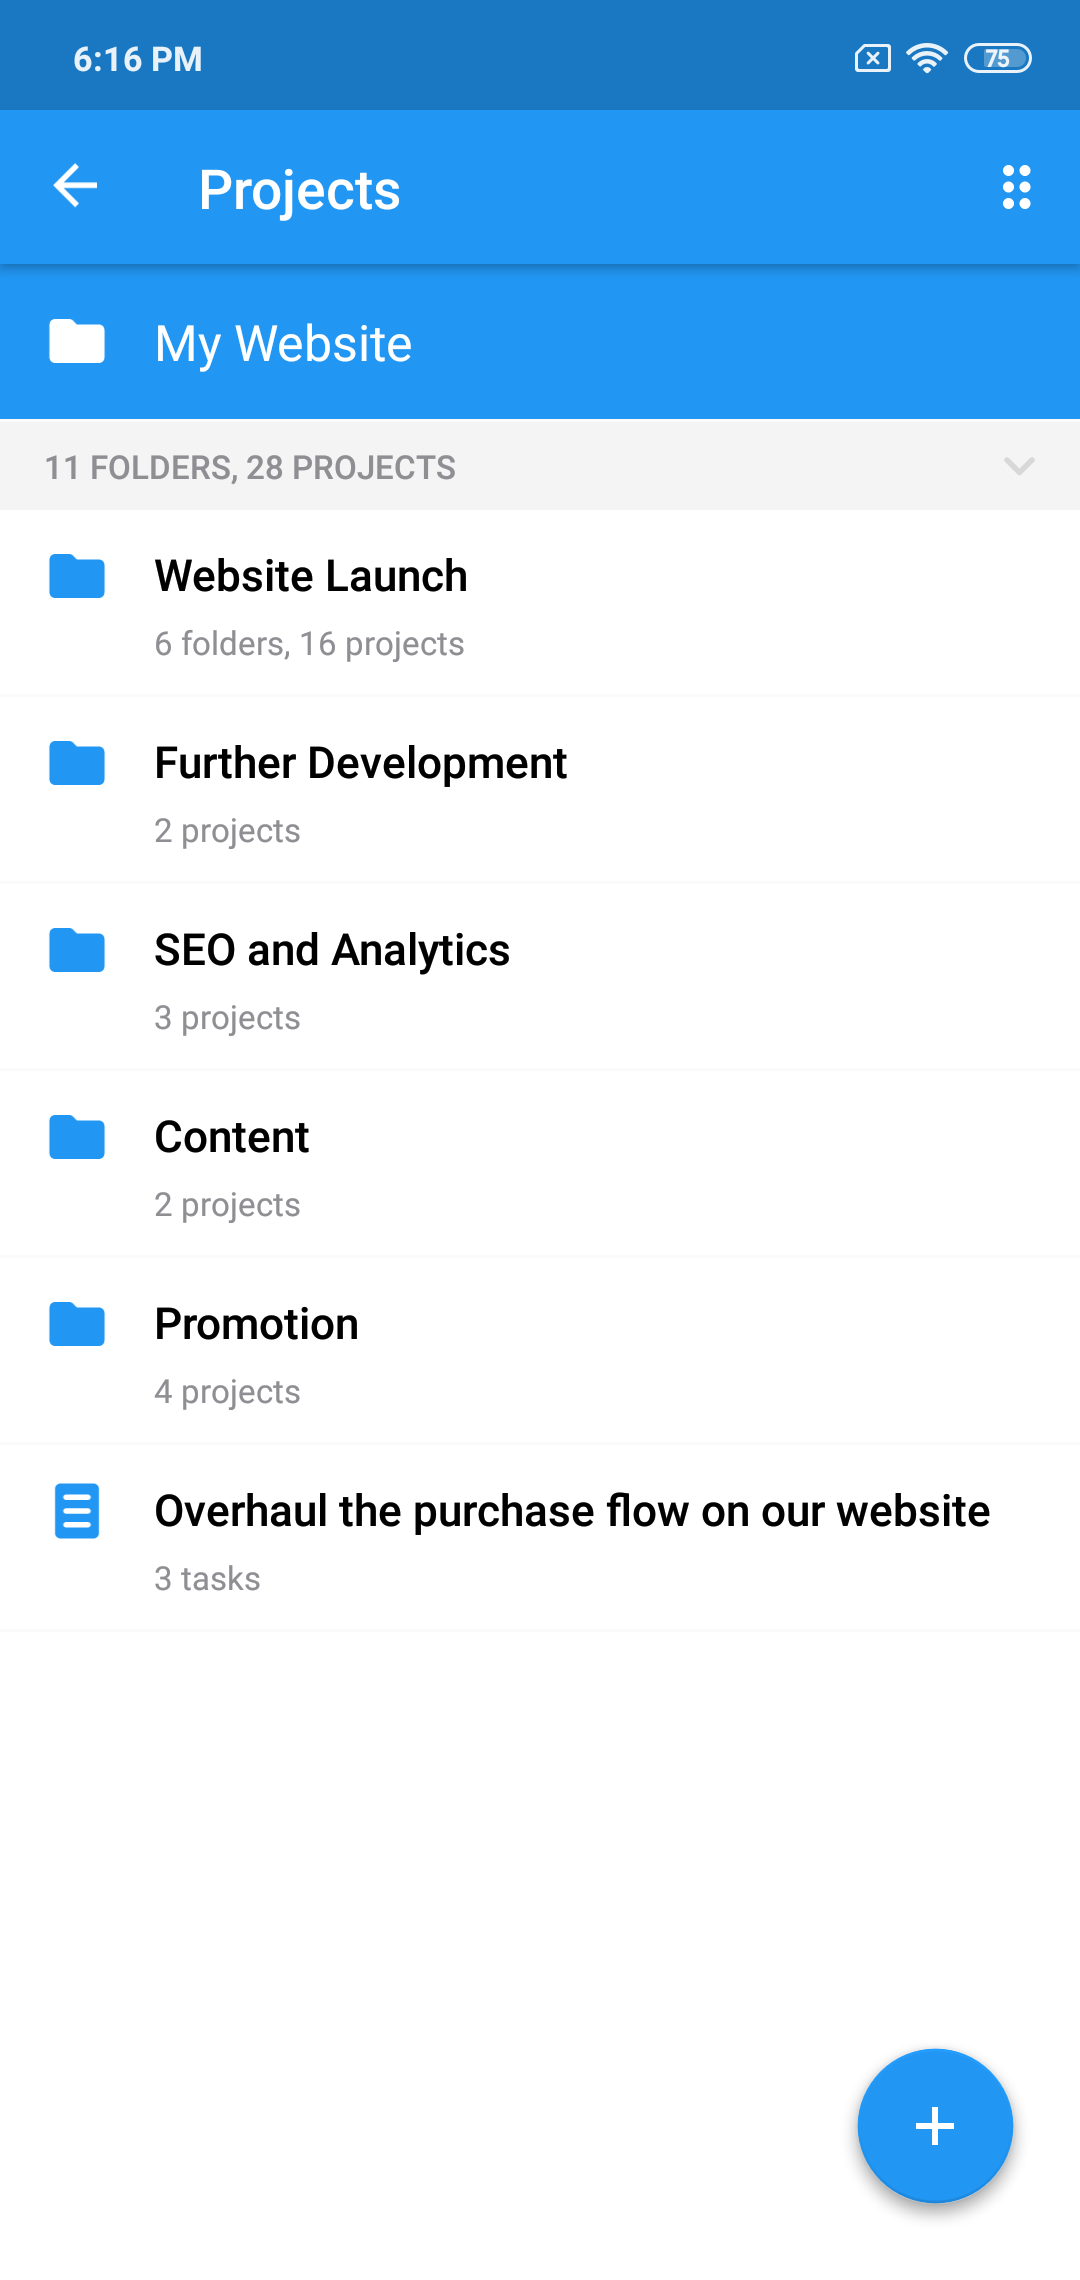
(Note that even in this early planning stage we are starting to think about further development plans and not just creating the website. This is very useful.)
3. Returning to the question of creating the website, let's define what we need to do to start the process. At a minimum, you will need to define the goals and objectives of the site, as well as make a list of requirements and features.
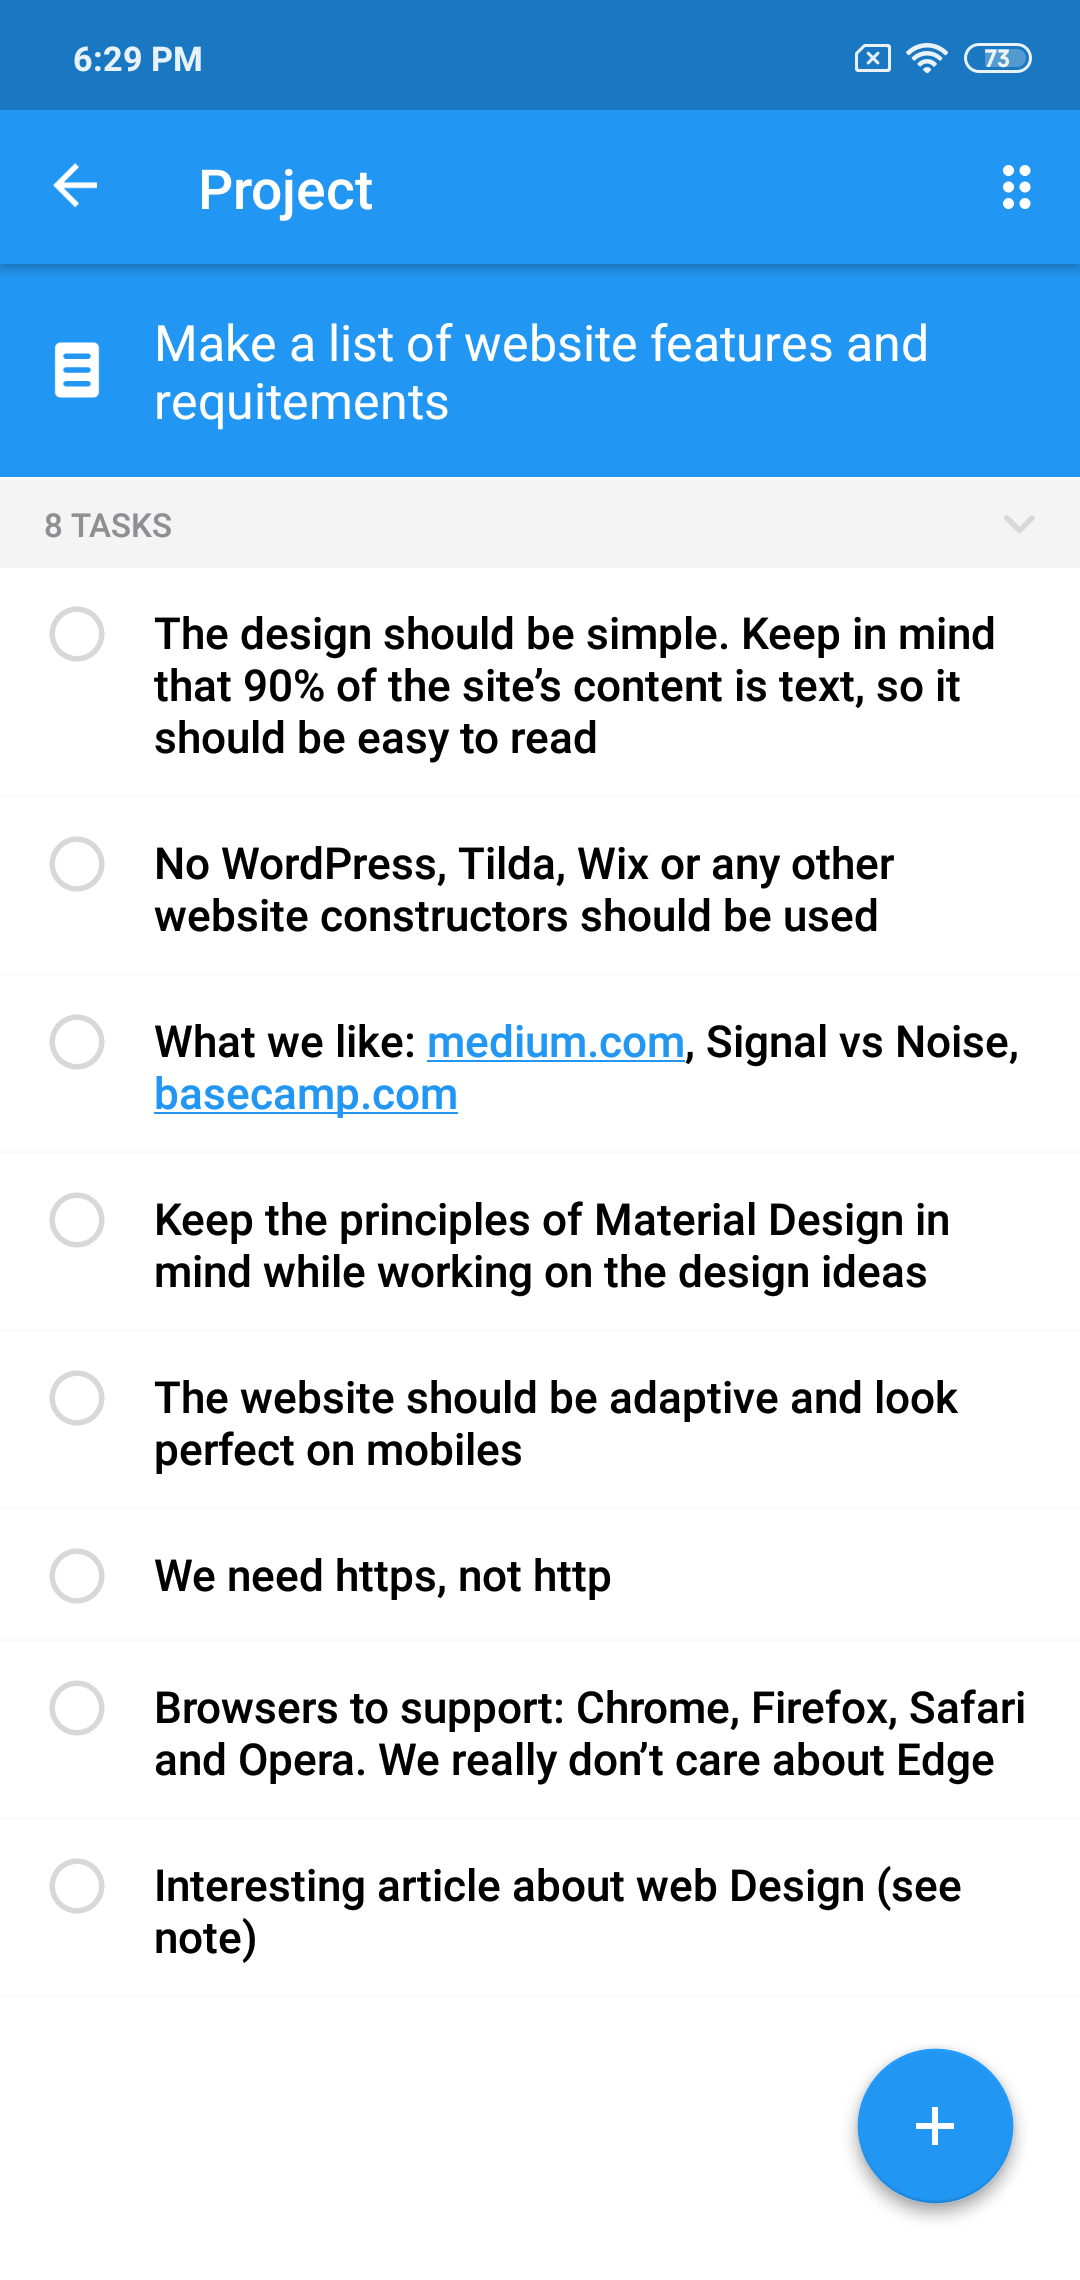
Lists of the site's goals, as well as a wish list can be created as projects called "Define first annual goals for the website" and "Make a list of website features and requirements."
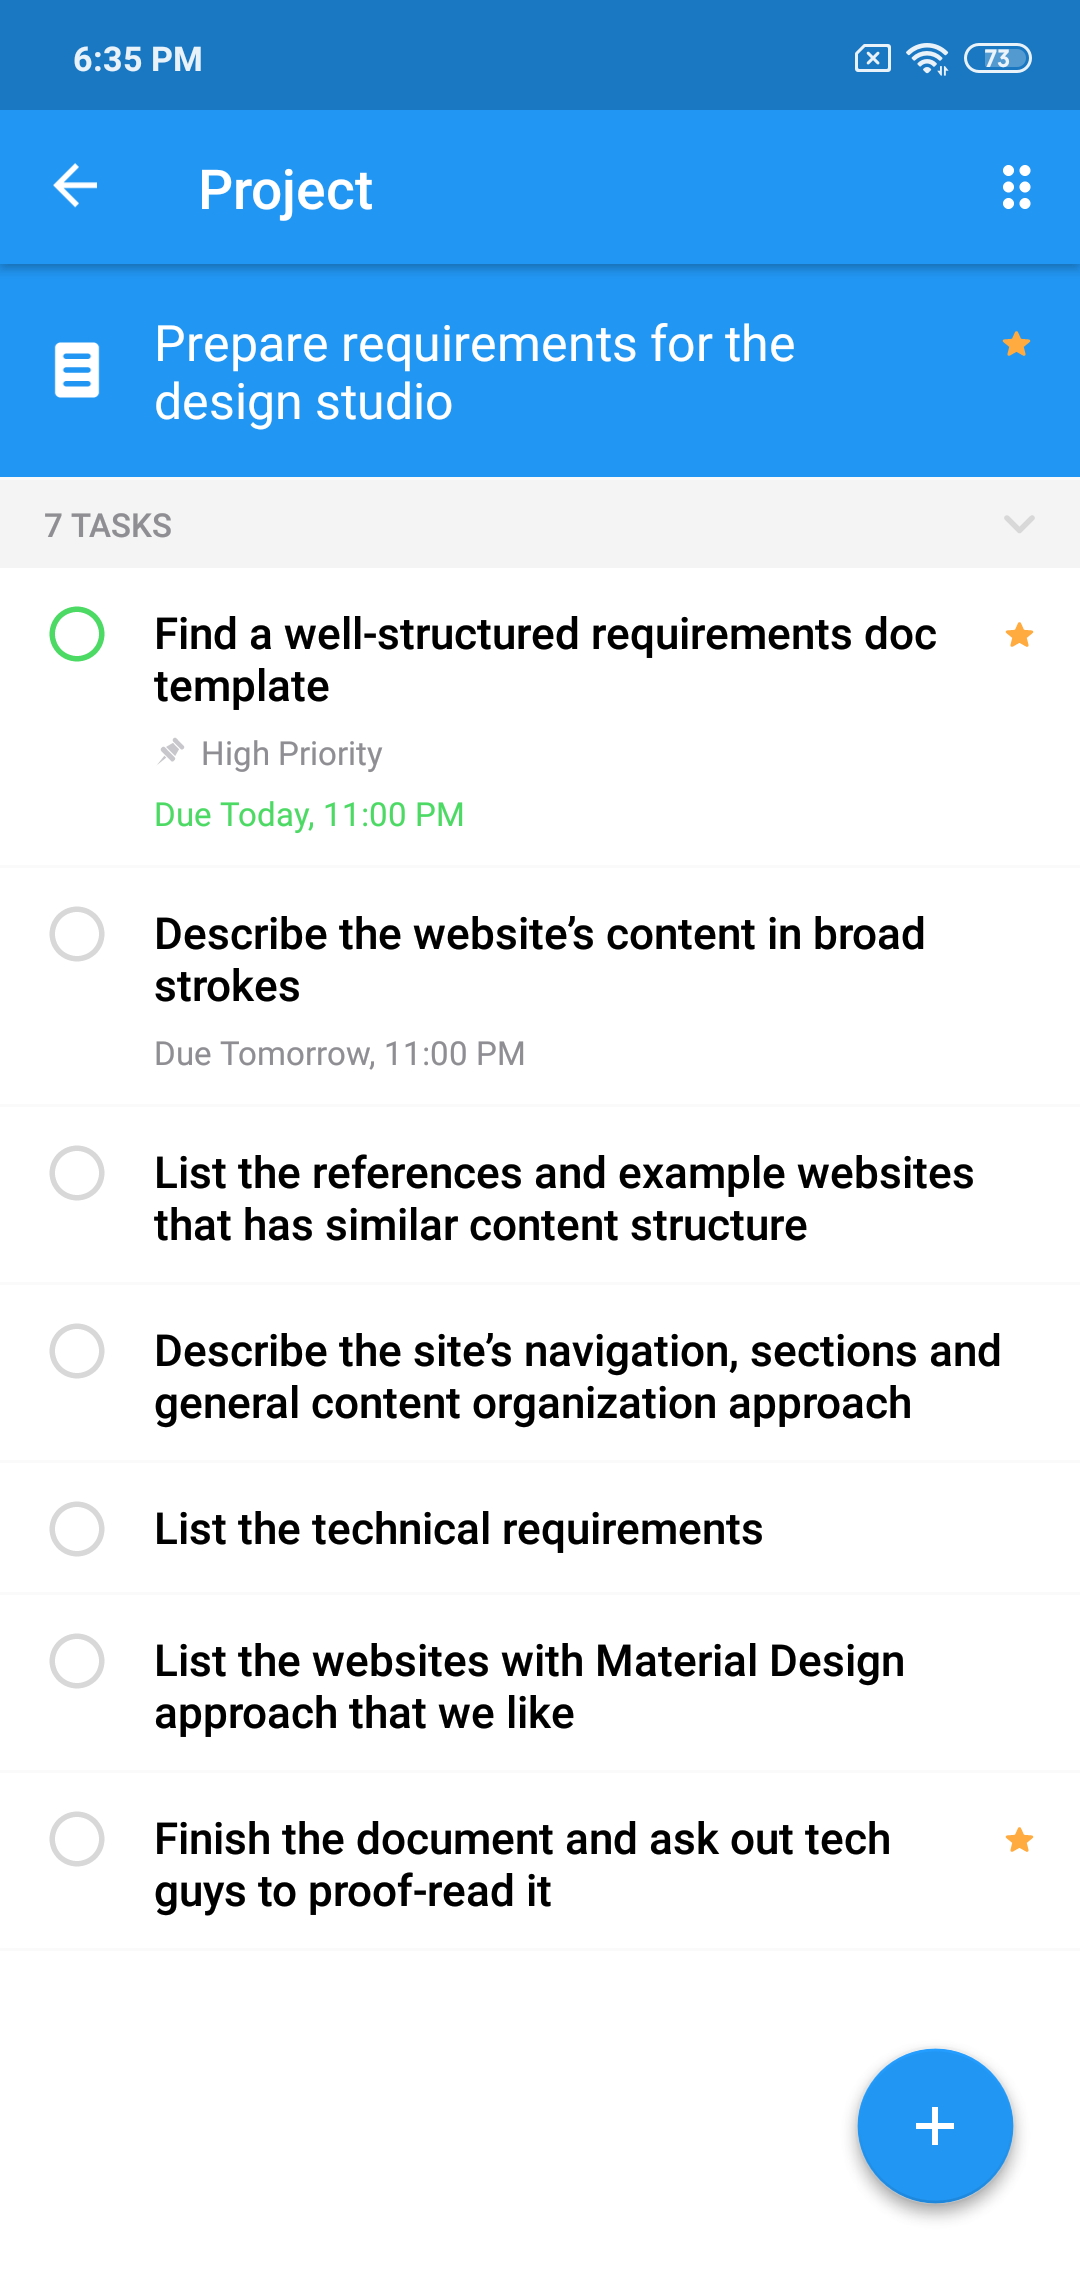
As soon as we create these projects, it becomes much easier to formulate a set of requirements to be used by developers and designers. Therefore, it makes sense to add a project called "Prepare a requirements doc for the design studio" in the same folder:
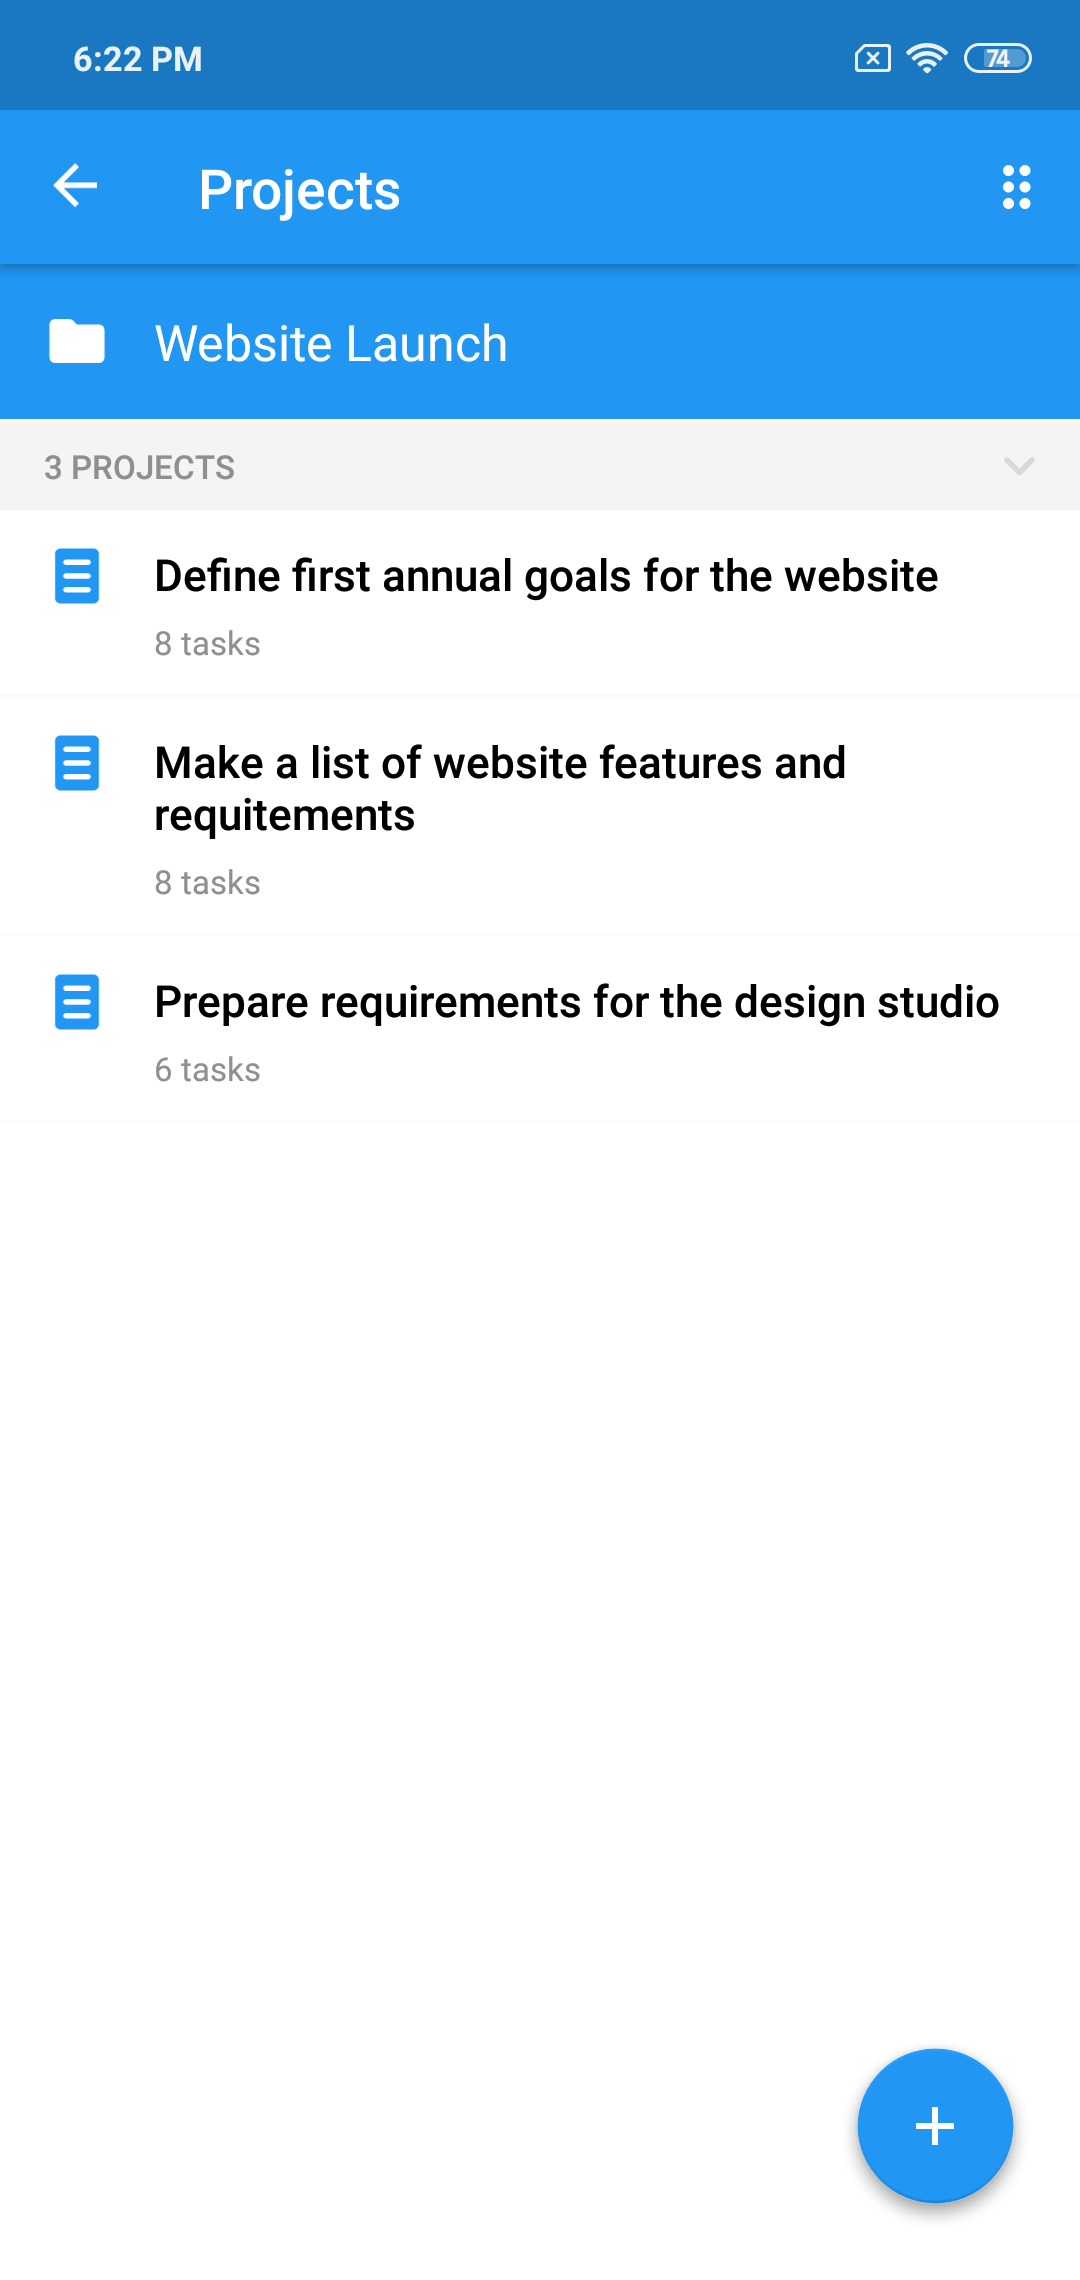
(Notice that the first two projects in our example store notes and ideas instead of tasks, and that’s just fine.)
On the other hand, "Prepare a requirements doc for the design studio" is a “true” project - with a goal and a corresponding list of tasks.
Note that you can change projects's icons for better representation of their nature:
4. As you work with a design studio on the site, new projects like "Provide feedback on the design templates" and "Test how the website works on mobiles" will be added. You can always create new folders to organize your projects however you want.
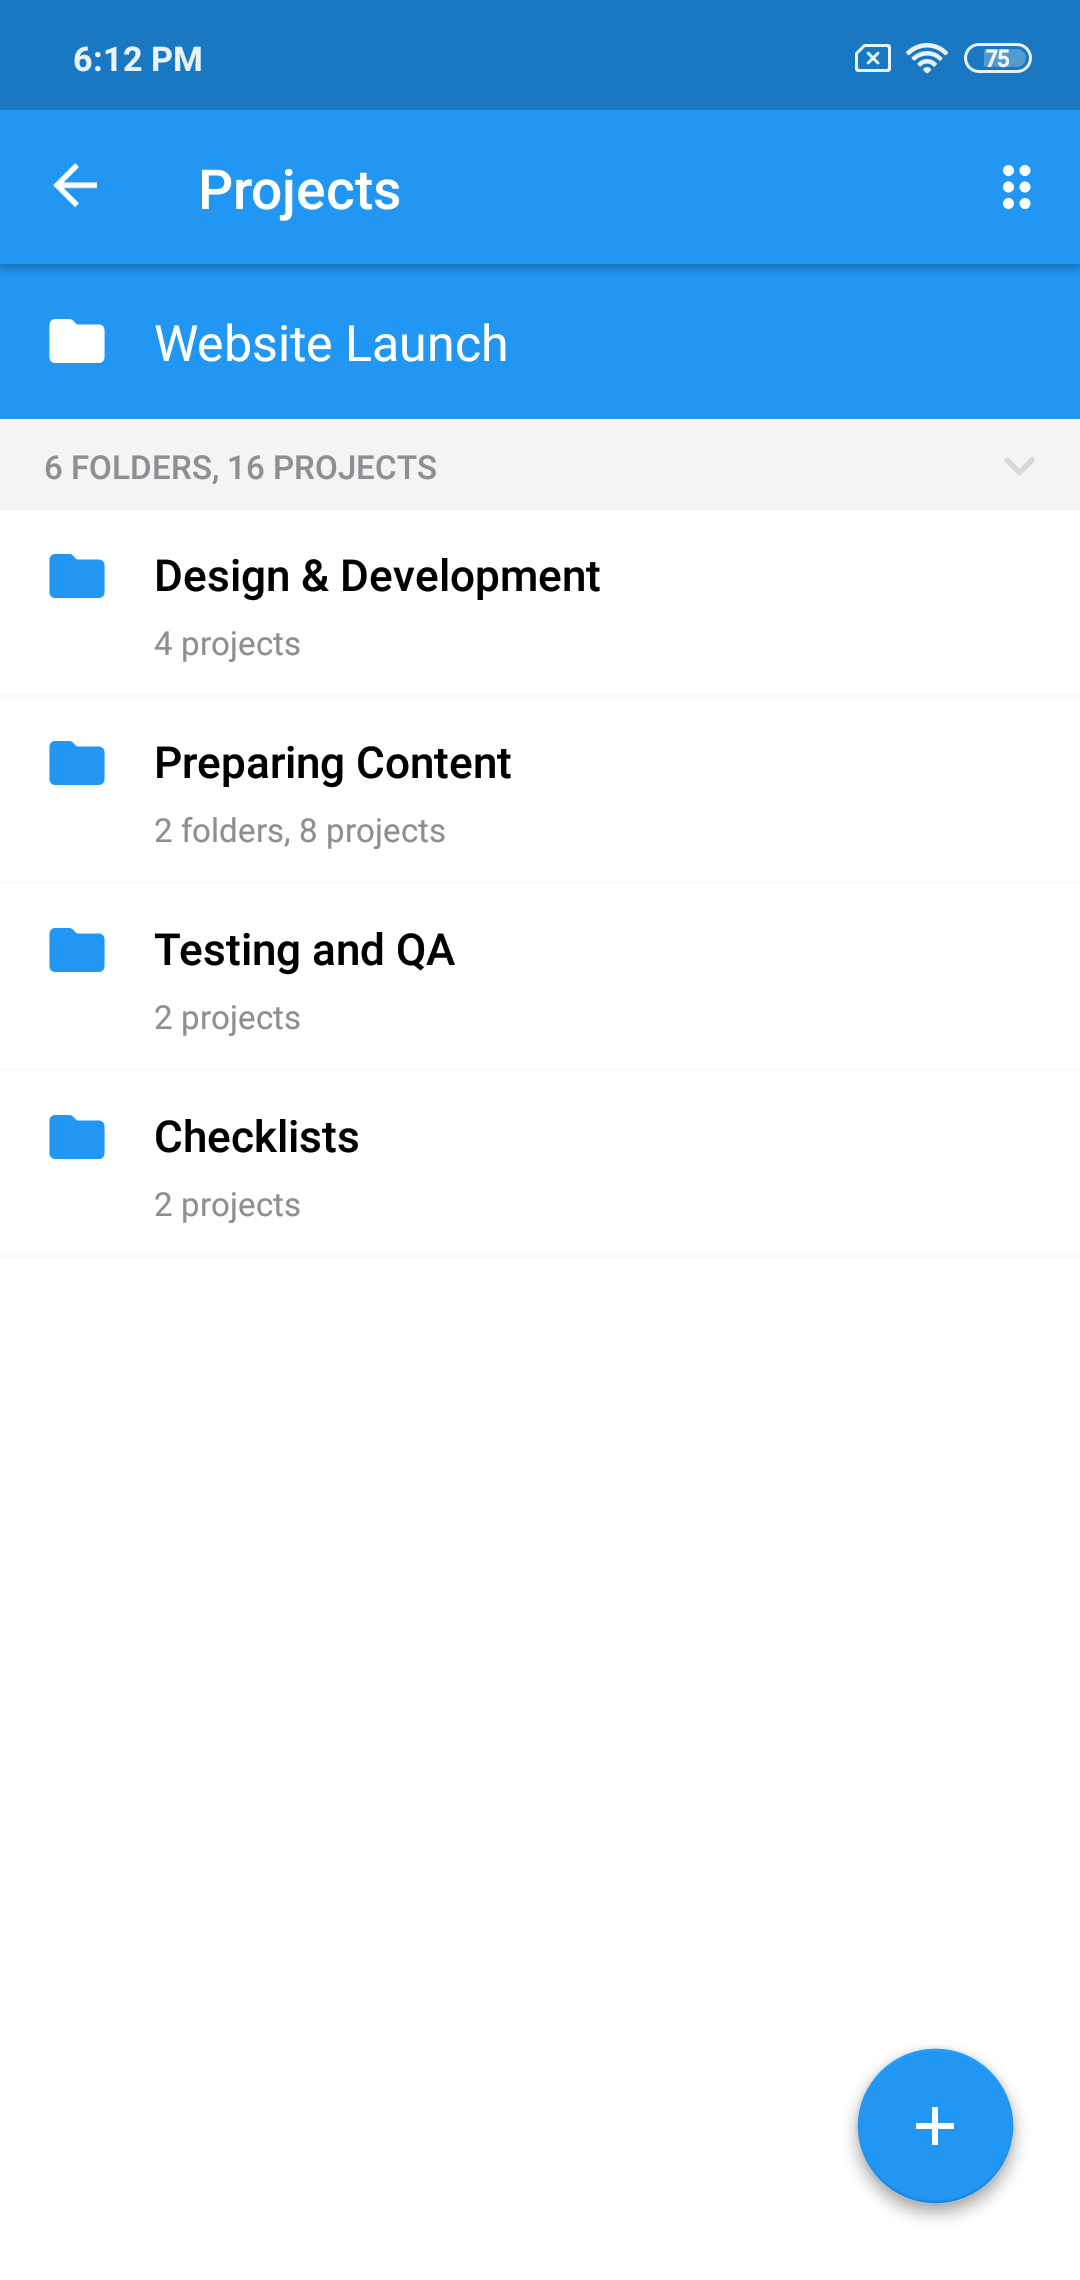
For example, it makes sense to combine checklist projects into the appropriate folder, and projects related to the inspection of mock-ups in their own. In the end, the contents of the "Website launch" folder may look like this:
When the first version of the product is finished, you will do roughly the same thing for the next stage. You can create a folder called "Website 2.0" and create as many sub-folders as you need.
The general rule is that at any time the structure of your folders and subfolders should be such as to ensure maximum simplicity and clarity. That is, projects should contain simple, understandable tasks, and names should be formulated as clearly as possible and lead to the fulfilment of a specific goal. Do not hesitate to delete, edit and move projects or folders around. Experiment to find the most convenient approach to organize your data.
Project planning requires practice, but this investment of your time will pay off very quickly.
Make sure to follow us on Twitter to receive the latest news and updates.